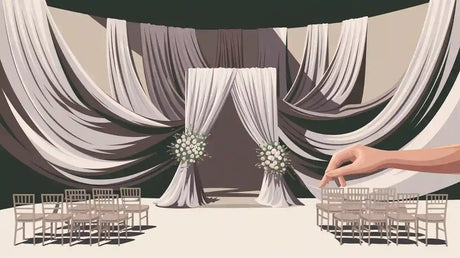
Looking to add some magic to your holiday decor? A Christmas balloons arch can transform any space into a festive wonderland. Imagine your guests walking through a stunning arch filled with vibrant colors and holiday cheer. It’s easier to create than you might think! You don’t need to be a pro or spend hours on it. With the right tools and a little creativity, you’ll have a show-stopping centerpiece in no time. Ready to get started? Let’s make your holiday unforgettable!
Key Takeaways
Collect items like balloons, a pump, and glue to start.
Think about your design before blowing up the balloons.
Decide the arch's size and shape to know balloon count.
Use a strip to space balloons evenly for a neat look.
Group balloons by size to make it look balanced.
Add lights and ornaments to make it festive and fun.
Use weights or sticky strips to keep the arch steady.
Materials Needed for Your Balloon Arch Kit
Making a Christmas balloon arch is simple with the right supplies. Here's a list of what you'll need to begin.
Must-Have Items in a Balloon Arch Kit
A balloon arch kit has everything to make your design pop. Common items include:
Latex balloons in different sizes and colors.
A balloon pump to quickly inflate balloons.
Balloon glue for sticking smaller balloons or decorations.
Balloon ribbon to tie and hold balloons in place.
Balloon thread to connect all the balloons together.
Scissors for cutting and trimming as needed.
These tools make building your arch easy, even for beginners. Choose kits with strong latex or foil balloons to keep your arch looking great during your event.
Extra Tools for Strong Assembly
To keep your balloon arch sturdy, you’ll need extra tools. Experts suggest using:
Tool/Material |
Purpose |
|---|---|
Helps attach your arch to walls or doorways without damage. |
|
Balloon weights or sandbags |
Keeps your arch steady, especially outside. |
Balloon arch frame or PVC pipe |
Gives your arch shape and balance for bigger designs. |
If you’re setting up outdoors, secure your arch with weights or anchors. A solid frame, like PVC pipe or wire, keeps your arch upright and stable.
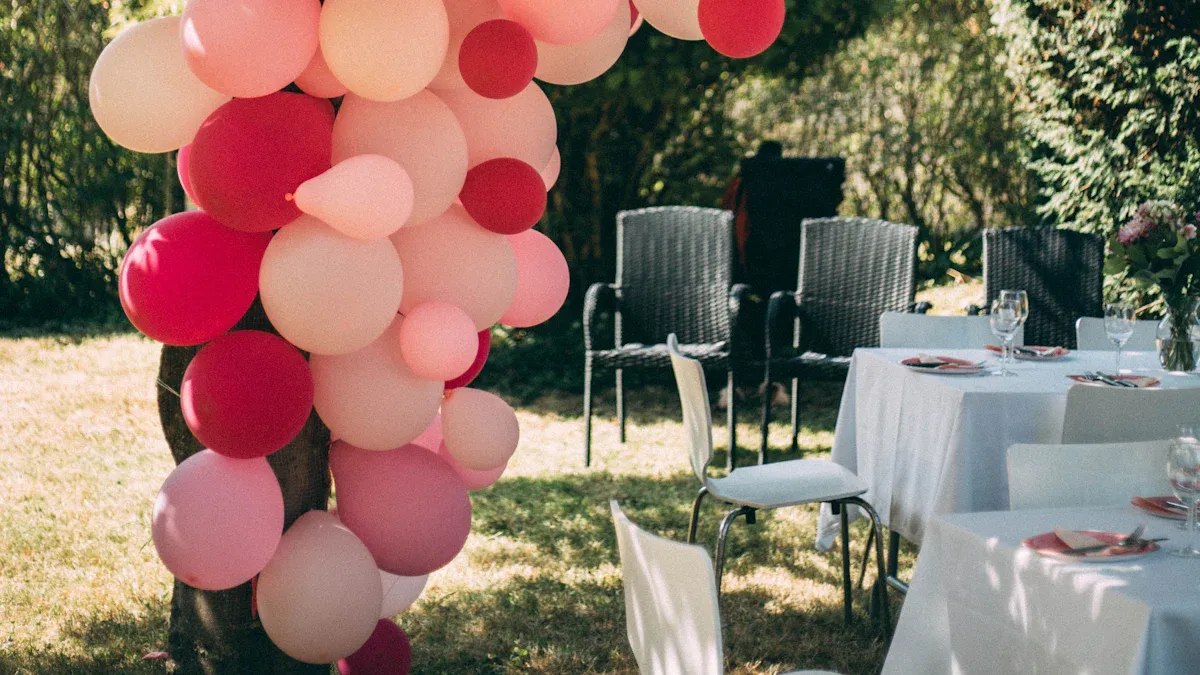
Fun Decorations for a Festive Look
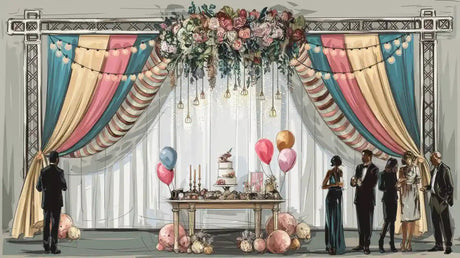
Want your balloon arch to stand out? Add holiday-themed decorations! Use ornaments, fairy lights, or small Christmas baubles for a unique touch. Kids love creative designs, so include family-themed or custom items. Stores often use themed boxes for displays, and you can do this at home too.
For a polished look, use a balloon decorating strip to space balloons evenly. These small extras make your arch look professional and festive!
Step-by-Step Guide to Assembling a Christmas Balloons Arch
Creating a Christmas balloons arch might seem tricky, but with these step-by-step instructions, you’ll have a stunning decoration in no time. Let’s dive in!
Step 1: Plan your design and unpack the kit
Before you start inflating balloons, take a moment to plan your design. Think about the size and shape of your arch. Will it frame a doorway, sit behind a dessert table, or stand as a centerpiece? The height and width of your arch will determine how many balloons you’ll need.
Here’s a quick tip: Larger balloons cover more space, while smaller ones create a fuller, denser look. If you want a precise calculation, use the Sean O’Kelly formula:
Number of balloons = (Total length of arch / Diameter of balloon) × 4.8
For example, if your arch is 10 feet long and you’re using 12-inch balloons, you’ll need about 48 balloons. Always keep extra balloons handy for replacements or last-minute adjustments.
Once you’ve planned your design, unpack your balloon arch kit. Lay out all the materials, including the balloons, frame, and tools. This will help you stay organized and avoid scrambling for items later.
Step 2: Inflate the balloons
Now comes the fun part—blowing up the balloons! Use a balloon pump to save time and energy. Inflate the balloons to their recommended size to avoid over-inflation, which can cause them to pop.
Here’s a handy table to guide you on inflation techniques:
Technique Type |
Description |
|---|---|
Nominal Pressure |
Inflate the balloon to match its natural size (1:1 ratio). |
High Pressure |
Slightly underinflate by 0.5 mm to reduce the risk of popping. |
Native Vessels |
Use high-pressure inflation for balloons that need to fit snugly into tight spaces. |
Stick to the nominal pressure method for most balloons in your arch. This ensures they look full and vibrant without overstretching.
Pro tip: Group balloons of similar sizes together. This makes it easier to create a balanced and visually appealing arch later.
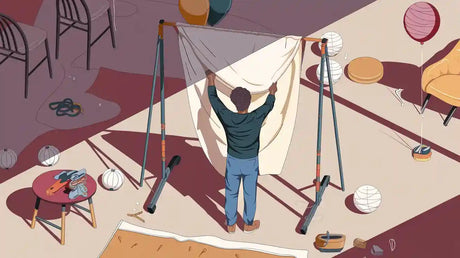
Step 3: Attach balloons to the arch frame
With your balloons ready, it’s time to assemble the arch. Start by attaching the balloons to the frame using balloon thread or a decorating strip. Secure each balloon tightly to prevent it from slipping.
For a sturdy and professional finish, follow these tips:
Use a 50 lb. test monofilament line to attach the balloons securely.
Tie the line with a fisherman’s knot for extra strength.
Wet the line slightly before tying it around the balloon knot. This helps the line slide smoothly without damaging the latex.
Work in sections, adding balloons evenly across the frame. Alternate colors and sizes to create a dynamic, layered effect. If you’re using a balloon decorating strip, insert the balloon knots into the pre-punched holes. This tool makes spacing a breeze and ensures a polished look.
Once all the balloons are attached, step back and check for gaps. Fill any empty spots with smaller balloons or decorative elements to complete the look.
Step 4: Add decorative elements
Now that your balloon arch is taking shape, it’s time to make it truly festive! Adding decorative elements will give your design that extra holiday sparkle. Here’s how you can elevate your Christmas balloons arch:
String Lights: Wrap fairy lights around the arch for a magical glow. Battery-operated lights work best since they’re lightweight and easy to hide.
Ornaments: Attach small Christmas ornaments or baubles to the balloons using balloon glue or clear tape. Choose colors that match your theme for a cohesive look.
Garlands: Drape tinsel or greenery garlands along the arch. This adds texture and a touch of holiday charm.
Themed Accents: Incorporate festive items like candy canes, snowflakes, or mini stockings. You can even add a star or bow at the top for a show-stopping centerpiece.
Pro Tip: Keep the decorations lightweight to avoid weighing down the arch. Heavy items can cause the balloons to sag or lose their shape.
Take a step back after adding each element to ensure everything looks balanced. Don’t be afraid to adjust or remove items if they feel out of place. Remember, less is often more when it comes to decorations.
Step 5: Secure and position the arch
Your balloon arch is almost ready! The final step is to secure it and position it in the perfect spot. Here’s how to do it:
Anchor the Base: Use balloon weights, sandbags, or heavy objects to keep the base steady. If you’re setting up outdoors, consider using stakes or tying the base to a sturdy structure.
Attach to a Surface: If your arch leans against a wall or doorway, use command hooks or adhesive strips to hold it in place. These won’t damage your surfaces and are easy to remove after the event.
Check Stability: Gently shake the arch to ensure it’s stable. If it wobbles, add more weights or adjust the frame.
Position Strategically: Place your arch where it will have the most impact. Popular spots include entryways, behind dessert tables, or as a photo backdrop.
Quick Tip: If you’re hosting a party, position the arch where guests will naturally gather. This makes it a focal point and a great spot for photos!
Once your christmas balloons arch is secure, step back and admire your work. You’ve created a stunning decoration that’s sure to impress your guests.
Pro Tips for an Amazing Balloon Arch
Picking the Best Colors for Christmas
Choosing the right colors makes your balloon arch stand out. Classic Christmas colors like red, green, gold, and silver are always popular. They bring a cheerful and festive feeling to any space. Want something different? Try white and gold for a fancy look or blue and silver for a snowy, winter theme.
Here’s a simple guide to popular Christmas color ideas:
Color Combo |
Popularity |
Mood It Creates |
|---|---|---|
Red and Green |
Fun, festive, and traditional |
|
White and Gold |
22% |
Stylish and elegant |
Blue and Silver |
15% |
Cool and magical |
Pick colors that match your holiday decorations or party style. Adding shiny metallics like gold or silver makes your arch look extra fancy.
How to Space Balloons Evenly
Evenly spaced balloons make your arch look neat and professional. Start by grouping balloons of the same size together. Use a balloon strip to keep the spacing even. Push each balloon knot into the holes, following a pattern like alternating colors or sizes.
Here’s a trick: Work on small sections at a time. This helps you notice and fix gaps early. Step back often to check how it looks. If you see a gap, fill it with smaller balloons or decorations.
Pro Tip: Use a ruler or tape measure if you want perfect spacing.
Fixing Common Problems
Sometimes things go wrong, but most balloon arch issues are easy to fix.
Balloons Keep Popping: This happens if they’re too full. Inflate them just enough and keep sharp objects away.
Arch is Drooping: Check the frame and base. Add weights or tighten connections to make it stronger.
Looks Uneven: Move balloons around or add extras to balance it out.
Quick Tip: If a balloon pops, replace it right away to keep the arch looking good. Always have spare balloons ready.
Follow these tips, and your balloon arch will amaze everyone who sees it!
Personalizing Your Balloon Arch for a Special Touch
Want your balloon arch to be unique? Adding personal touches makes it stand out. With some creativity, you can turn a simple arch into a stunning holiday decoration.
🎨 Experiment with Colors
Colors create the vibe for your arch. Traditional Christmas colors like red, green, and gold are always great. But you can try soft pastels or bright shades for something different. Picture a pink and white arch for a cozy brunch or bold jewel tones for a fun party. Metallic balloons, like gold or silver, bring extra sparkle.
Tip: Confetti balloons add shine and catch the light beautifully!
✨ Try Creative Arrangements
Think of new ways to arrange your balloons. Use different sizes for texture or make patterns like stripes or clusters. Add themed shapes like snowflakes or candy canes for a festive touch.
Metallic balloons give a fancy look.
Balloons with prints, like snowmen, add holiday cheer.
Mix matte and shiny balloons for a trendy style.
🌟 Match It to Your Event
Every event is special, so your arch should fit the occasion. Hosting a family dinner? Add name tags or mini stockings for a personal feel. Throwing a party? Use big balloons and bold decorations for a dramatic effect.
Quick Tip: Keep your theme consistent. Match your arch with your other decorations for a neat look.
Making your balloon arch unique is all about being creative. Try new ideas and make it your own. Your guests will notice and love the effort you put into it!
Assembling a Christmas balloon arch is easier than you think! It’s a fun project that lets you get creative while adding a festive touch to your celebrations. With the right materials and steps, you can craft a stunning centerpiece that wows your guests.
🎄 Pro Tip: Don’t stress about perfection—your unique touches make it special!
So, grab your supplies, follow the guide, and enjoy the process. You’ll love seeing your hard work come to life. Ready to impress everyone with your holiday masterpiece? Let’s do this!
FAQ
What size balloons work best for a Christmas balloon arch?
You can use a mix of sizes for the best look. Typically, 5-inch, 10-inch, and 12-inch balloons work well. Larger balloons fill space quickly, while smaller ones add detail.
Tip: Combining different sizes creates a fuller, more dynamic arch!
How long will a balloon arch last?
A balloon arch can last 1-2 days indoors. If you’re using high-quality balloons and keeping them away from heat or sharp objects, they might last even longer.
Quick Tip: For outdoor setups, avoid direct sunlight to prevent popping.
Can I reuse my balloon arch frame?
Yes! Most balloon arch frames, like PVC pipes or metal stands, are reusable. After your event, carefully disassemble the frame and store it for future use.
Pro Tip: Clean the frame before storing to keep it in great condition.
How many balloons do I need for a 10-foot arch?
For a 10-foot arch, you’ll need about 50-60 balloons. The exact number depends on the size of the balloons and how dense you want the arch to look.
Formula: Use the Sean O’Kelly formula mentioned earlier for precise calculations.
Can I make a balloon arch without a frame?
Yes, you can! Use command hooks or adhesive strips to attach the balloons directly to a wall or doorway. Balloon decorating strips also work well for creating a freestanding arch without a frame.
Note: Without a frame, the arch might not be as sturdy.