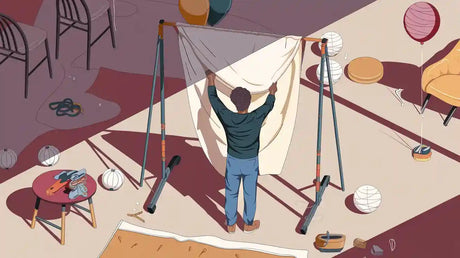
Ever thought about making your own balloon stand? It’s easier than you think! DIY balloon stands are affordable and give you full creative control. You can match them to any event theme, whether it’s a birthday party or a wedding. Plus, it’s a fun project anyone can enjoy, even if you’ve never crafted before.
Key Takeaways
Collect all the needed supplies before making your balloon stand. You’ll need a sturdy base, pole, balloon holders, and tape. Being prepared helps things go faster and easier.
Make sure your balloon stand stays steady by using weights or sand in the base. A strong base stops it from falling, especially with big balloons.
Decorate your stand in fun ways! Add ribbons, lights, or themed items to make it special. This makes your stand match your event’s style.
Materials for a DIY Balloon Stand
Before starting your balloon stand, gather all the needed supplies. Having everything ready will make building it easier and more fun. Let’s split the items into must-haves and optional decorations.
Essential Tools and Supplies
To make a strong and nice-looking balloon stand, you’ll need some basic items. Most of these can be found at craft stores or online. Here’s what you’ll need:
Strong base: Use a sturdy plate or cake board (8cm or bigger). This keeps the stand steady.
Pole or stick: A strong metal or plastic pole will hold the stand together.
Balloon cups and sticks: These make it easier to attach and arrange balloons.
Balloon rings: Use these to group balloons and attach them to the pole.
Sticky tape: Clear tape with a dispenser is great for quick fixes.
Fishing line or nylon thread: This helps tie balloons or give extra support.
Sand or weights: Add sand or weights to the base for more stability.
Balloon sizer: This tool helps make balloons the same size for a neat look.
Helium tank (optional): Use this if you want balloons to float.
Pro Tip: If you’re new to this, start simple. You can add more tools later as you get better.
These items will help you build a strong balloon stand. Once you have them, you’re ready to begin!
Optional Decorations for Personalization
Now comes the exciting part—decorating your balloon stand to fit your event! Adding special touches can make your stand look amazing. Here are some ideas to try:
Tulle or ribbons: Wrap these around the pole or base for a soft, pretty style.
Lights for balloons: Put LED lights inside balloons or around the stand for a glowing effect.
Cellophane wrap: Add shiny cellophane for a polished, professional look.
Themed accessories: Use small props like flowers for weddings or flags for birthdays.
Hi-Float solution: This helps helium balloons stay floating longer, great for long events.
Custom colors: Pick balloons that match your theme. Mix matte, metallic, and glossy ones for variety.
Did You Know? Balloon decorations are super popular again! They’re perfect for making events like weddings and birthdays unforgettable.
Decorating your balloon stand is where you can get creative. Whether you keep it simple or go all out, these ideas will help you make it special.
How to Make a Balloon Stand
Step 1: Gather and Prepare Your Materials
Before you start building your balloon stand, make sure you have all your materials ready. Lay everything out on a clean surface so you can easily grab what you need. This will save you time and keep the process smooth. Double-check that your base, pole, balloon cups, and other essentials are in good condition. If you’re using optional decorations like ribbons or lights, keep them nearby too.
Quick Tip: If you’re spray-painting your stand, do it now. Use a primer first for a smooth finish, then add your chosen color. Let it dry completely before moving on.
Step 2: Create a Stable Base
A strong base is the foundation of your balloon stand. Start by drilling a hole in the center of your base (like a sturdy plate or cake board). The hole should fit your pole snugly to keep it steady. Insert the pole into the hole and secure it with glue or tape. For extra stability, add weights or sand to the base. This will prevent your stand from tipping over, especially if you’re using large balloons.
Fun Fact: Stability works best when the center of gravity is low. Adding weight to the base helps keep your stand upright, even if it’s bumped.
Step 3: Assemble the Balloon Stand Structure
Now it’s time to build the structure. Attach the balloon cups to the pole, spacing them evenly. If you’re using balloon rings, slide them onto the pole at different heights. This creates a layered look that’s visually appealing. You can also add honeycomb decorations, tassels, or ribbons to the pole for extra flair. Mix and match colors to make your stand pop!
Pro Tip: Use fishing line or nylon thread to secure decorations. It’s strong and nearly invisible, giving your stand a clean, professional look.
Step 4: Attach Balloons to the Stand
Blow up your balloons to the desired size. A balloon sizer can help you keep them uniform, which makes your stand look neat. Attach the balloons to the cups or rings, arranging them in clusters or patterns. For a dramatic effect, use a large balloon as a topper. Secure it with tape or thread to keep it in place. If you’re using helium, tie the balloons to the stand with ribbon to prevent them from floating away.
Did You Know? Adding LED lights inside your balloons can create a magical glow, perfect for evening events.
Step 5: Add Final Decorative Touches
This is where your creativity shines! Wrap tulle or ribbons around the pole for a soft, elegant look. Add themed accessories like flowers, flags, or small props to match your event. If you’re going for a polished finish, use shiny cellophane or metallic accents. Don’t forget to step back and admire your work. Adjust anything that looks out of place, and you’re done!
Reminder: A little personalization goes a long way. Your diy balloon stand should reflect your style and the theme of your event.
Tips for a Perfect DIY Balloon Stand
Ensuring Stability and Safety
Stability is key when building your DIY balloon stand. You don’t want it tipping over in the middle of your event! Start by ensuring your base is heavy enough. Adding weights or sandbags can make a big difference, especially for outdoor setups. If you’re creating an arch, secure it with command hooks or adhesive strips to keep it in place.
Here’s a quick guide to help you avoid common stability issues:
Step |
Description |
|---|---|
1 |
Inflate balloons evenly using an electric hand pump to prevent overinflation. |
2 |
Use larger balloons at the bottom for a solid foundation. |
3 |
Attach balloons with garland tape for a secure hold. |
4 |
Cluster balloons for a fuller, more balanced look. |
5 |
Anchor the structure with hooks or adhesive strips. |
6 |
Add weights or sandbags for extra stability. |
Quick Tip: If you’re working outdoors, always test your stand for wind resistance before the event starts.
Creative Ideas for Customization
Your DIY balloon stand should reflect your style and event theme. Get creative with colors, textures, and accessories. Mix matte and metallic balloons for a modern look, or add tulle and ribbons for a softer vibe. LED lights inside the balloons can create a magical glow, perfect for evening events.
Want to know what works best? Gather feedback from friends or guests. Ask them what stands out and what could be improved. This way, you’ll know how to make your next design even better.
Fun Idea: Use themed props like mini flags for birthdays or flowers for weddings to make your stand unforgettable.
Troubleshooting Common Problems
Sometimes things don’t go as planned, but don’t worry—you can fix most issues quickly. If your stand feels wobbly, double-check the base. Adding more weight usually solves the problem. Uneven balloons? Use a balloon sizer to get them all the same size.
Here are some tools that can help:
Balloon weights or sandbags for outdoor setups.
Balloon arch frames or PVC pipes for extra support.
Reminder: Always test your stand before the event. A quick trial run can save you from last-minute stress.
Making your own balloon stand is easier than you might think. It’s a creative way to add a personal touch to any event. Don’t be afraid to try new ideas and make it your own. Share your designs with friends or family—they’ll love seeing your creativity in action. Have fun crafting!
FAQ
How long does it take to make a balloon stand?
It usually takes about 30-60 minutes, depending on your design and experience. Simple stands are quicker, while detailed ones take more time.
Can I reuse my balloon stand?
Yes! You can reuse the base and pole. Just replace the balloons and decorations to match your next event’s theme.
What’s the best way to transport a balloon stand?
Detach the balloons and decorations before moving it. Reassemble everything at the event location to avoid damage or tangling.
Tip: Keep extra balloons and tape handy for quick fixes during transport!