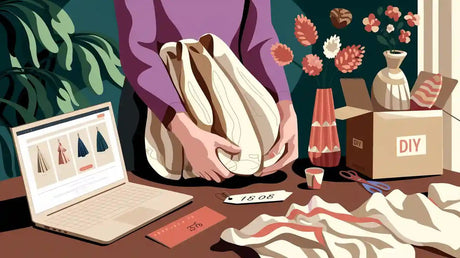
Balloon backdrops bring an extra layer of excitement to any party! They’re vibrant, playful, and instantly grab everyone’s attention. Imagine stepping into a celebration and being greeted by a colorful balloon backdrops wall—it’s an instant mood booster. The best part? You don’t need to be a pro to create one. In fact, over 90% of people who try DIY balloon backdrops are thrilled with the results. Plus, with the rise of eco-friendly options, you can craft an eye-catching display while being kind to the planet. Ready to get creative? Let’s dive in and make your event unforgettable with a dazzling balloon backdrops!
Key Takeaways
Collect needed items like balloons, a strong frame, and pumps. These help you build a great backdrop.
Decide your design and colors before you begin. A good plan makes your backdrop look better.
Use different balloon sizes and colors for variety. This makes your display look more professional.
Add personal touches like plants or lights to stand out. These make your backdrop special and unforgettable.
Don’t overinflate balloons or pick clashing colors. These tips keep your backdrop neat and pretty.
Essential Materials for Balloon Backdrops
Creating stunning balloon backdrops starts with gathering the right materials. Here’s what you’ll need to get started:
Types and Sizes of Balloons
Balloons are the stars of your backdrop, so choosing the right ones is key. You’ll want a mix of sizes to create depth and variety. Standard sizes like 5-inch, 10-inch, and 12-inch balloons work well for most designs. For added flair, consider oversized balloons (18 inches or larger) or mini balloons for accents. Latex balloons are the most common choice, but foil balloons can add a shiny, metallic touch. Don’t forget to pick colors that match your theme or event!
Tip: Double-stuffing balloons (placing one balloon inside another) can create custom colors and a more luxurious look.
Tools for Inflation and Assembly
Inflating dozens of balloons by mouth? That’s a no-go! Invest in a balloon pump or an electric inflator to save time and energy. Hand pumps are great for smaller projects, while electric inflators are perfect for larger setups. You’ll also need balloon ties or clips to secure them. For assembly, fishing line, balloon tape, or glue dots work wonders for holding everything together without making a mess.
Pro Tip: Use a balloon sizer to ensure consistent sizes, especially if you’re aiming for a polished, professional look.
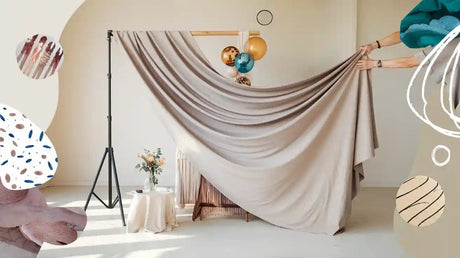
Backdrop Frames and Support Structures
A sturdy frame is the backbone of your balloon backdrop. You can use a pre-made balloon arch kit, PVC pipes, or even a lightweight metal stand. For smaller setups, a foam board or wooden frame works well. Make sure the structure is stable, especially if your event is outdoors. Weighted bases or sandbags can help keep everything in place.
Note: If you’re on a budget, try using a curtain rod or string tied between two chairs as a simple DIY frame.
Adhesives and Accessories
To put your balloon backdrops together, you’ll need adhesives and tools. These items make the process easy and keep everything secure. Here’s what to use:
Balloon Glue Dots: These small, clear dots stick balloons together neatly. They’re simple to use and hold balloons tightly.
Balloon Tape Strips: Use this to create balloon garlands. The tape has holes for balloon knots, making designs easy to build.
Fishing Line or String: For bigger backdrops, fishing line gives strong, hidden support. It blends well with your display.
Command Hooks or Clips: These attach your backdrop to walls or surfaces. They’re easy to remove and won’t harm the area.
Tip: Test adhesives on a small spot first, especially on painted or delicate surfaces.
Optional Add-Ons for Decoration
Want to make your balloon backdrops even better? Try these extra decorations:
Greenery and Flowers: Add fake or real greenery for a classy touch. Place vines or flowers between balloons for a natural style.
Fairy Lights: Use string lights to make your backdrop shine at night. Wrap them around the frame or weave them through balloons.
Confetti Balloons: Fill clear balloons with confetti for a fun look. Match the confetti colors to your theme.
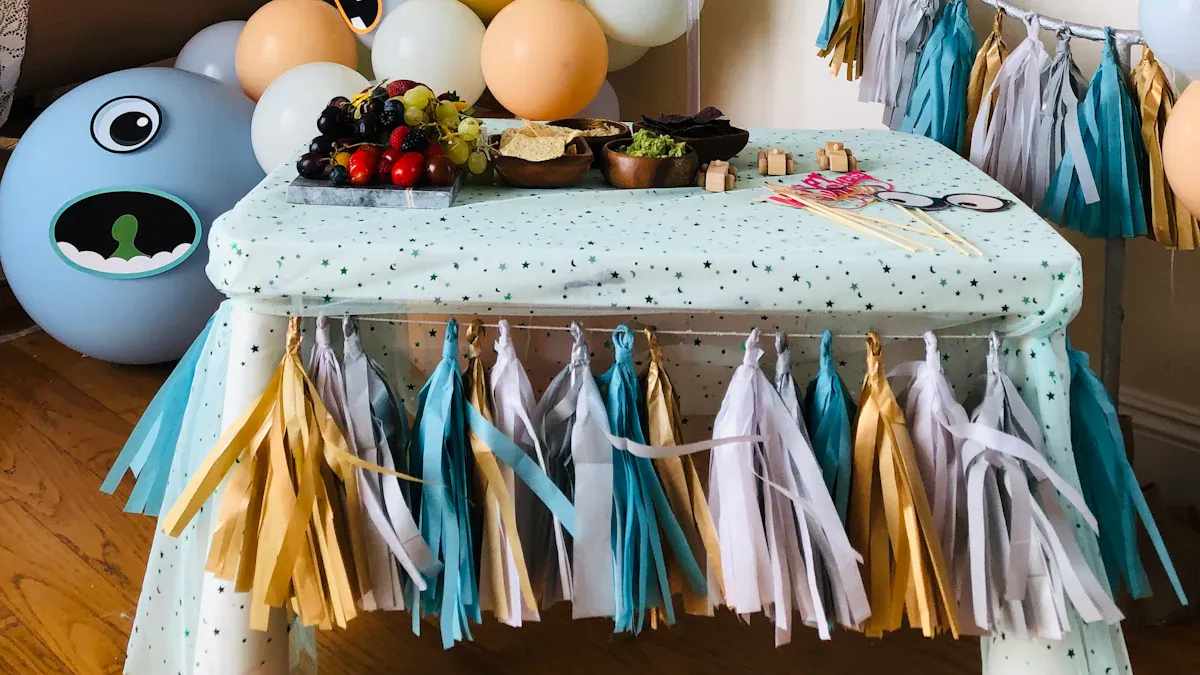
Ribbons and Tassels: Hang ribbons or tassels at the bottom for movement and texture.
Custom Signs or Banners: Add a name, message, or themed sign to personalize your display. It ties everything together nicely.
Pro Tip: Don’t add too many decorations. A few key items can make your backdrop look clean and stylish.
Step-by-Step Guide to Making Balloon Backdrops
Planning the Design and Color Scheme
Before you start inflating balloons, take a moment to plan your design. A well-thought-out color scheme can make your balloon backdrop stand out and match the vibe of your event. Think about the mood you want to create. For a wedding, soft pastels like blush pink or lavender work beautifully. For a birthday party, bold and bright colors like red, yellow, and blue bring energy to the space.
Here are some tips to help you plan:
Choose balloon types that fit your theme. Latex balloons are versatile, while foil balloons add a shiny, festive touch.
Match your color scheme to the event. Pastels create a romantic feel, while bold colors are perfect for lively celebrations.
Experiment with creative arrangements. Balloon flowers, arches, or clusters can add a unique twist to your design.
Once you’ve decided on your colors and layout, sketch a quick design. This will guide you as you assemble your backdrop and ensure everything looks cohesive.
Fun Fact: A successful DIY balloon backdrop project was completed by two people in under four hours. With teamwork and planning, you can achieve stunning results too!
Preparing and Inflating the Balloons
Now it’s time to bring your design to life! Start by gathering all your balloons and tools. Inflate the balloons to the sizes you planned earlier. Using a balloon sizer can help you keep everything consistent.
Here’s how to make the process smooth:
Use an electric balloon pump to save time and effort.
Inflate balloons in batches based on size. For example, inflate all the 5-inch balloons first, then move on to the 10-inch ones.
Tie the balloons securely. If you’re using double-stuffed balloons, make sure both layers are tied together.
Pro Tip: Don’t overinflate the balloons. Slightly underinflated balloons are less likely to pop and are easier to work with.
Once all your balloons are ready, group them by size and color. This will make it easier to assemble your backdrop later.
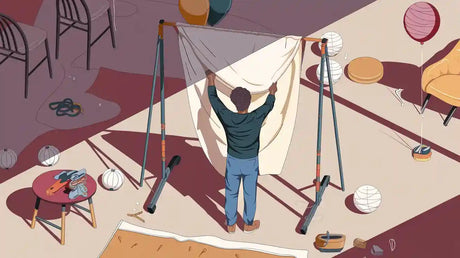
Assembling the Backdrop Frame
Your frame is the foundation of your balloon backdrop, so it needs to be sturdy and reliable. If you’re using a pre-made balloon arch kit, follow the instructions provided. For DIY frames, PVC pipes or lightweight metal stands work well.
Here’s a simple way to set up your frame:
Assemble the frame according to your design. If you’re creating an arch, bend the frame into the desired shape.
Secure the frame with weighted bases or sandbags, especially if your event is outdoors.
Attach hooks or clips to the frame to hold the balloons in place.
Tip: If you’re on a budget, you can use a curtain rod or string tied between two chairs as a simple frame. Just make sure it’s stable enough to hold the balloons.
With your frame ready, you’re all set to start attaching the balloons and building your masterpiece!
Attaching and Layering Balloons
Now comes the fun part—bringing your balloon backdrop to life! Attaching and layering balloons is where your design starts to take shape. Follow these steps to create a stunning display:
Start with the largest balloons: Begin by attaching the biggest balloons to your frame. These will serve as the base of your backdrop. Use balloon tape or fishing line to secure them. Space them evenly to create a balanced look.
Add medium-sized balloons: Once the large balloons are in place, fill in the gaps with medium-sized ones. This helps create a fuller and more dynamic appearance. Attach them slightly overlapping the larger balloons for a layered effect.
Finish with the smallest balloons: Use the smallest balloons to fill any remaining gaps. These act as accents and add depth to your design. You can cluster them in groups of three or four for a playful touch.
Experiment with placement: Don’t be afraid to adjust the balloons as you go. Step back occasionally to check the overall look. This helps you spot any uneven areas or gaps that need attention.
Tip: Use glue dots for smaller balloons. They’re easy to work with and allow you to position balloons precisely where you want them.
Layer for texture: To make your balloon backdrop stand out, layer balloons of different sizes and colors. This creates a textured, three-dimensional effect that’s visually appealing.
Pro Tip: If you’re using double-stuffed balloons, place them strategically to highlight their unique colors and add a luxurious feel to your backdrop.
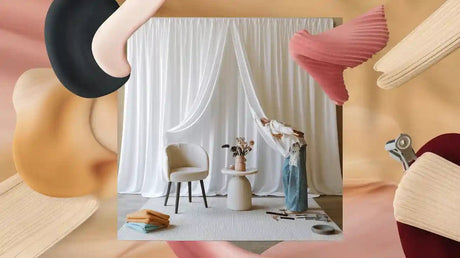
Adding Final Touches and Decorations
With the balloons in place, it’s time to add those little extras that make your backdrop truly special. These finishing touches can elevate your design and tie it to your event theme.
Incorporate greenery or flowers: Tuck artificial or fresh greenery between the balloons for a natural, elegant vibe. Flowers, whether real or faux, can add pops of color and a touch of sophistication.
Add lights for sparkle: String fairy lights or LED strips around your backdrop. This works especially well for evening events, creating a magical glow that draws attention.
Use themed accents: For a birthday party, you could add number balloons or a banner with the guest of honor’s name. For a wedding, consider adding white tulle or a “Just Married” sign.
Play with textures: Hang ribbons, tassels, or fabric swags from the bottom of your backdrop. These elements add movement and make the display more dynamic.
Personalize it: Include custom elements like a monogram, logo, or message that reflects the occasion. This makes your balloon backdrop feel unique and memorable.
Note: Keep the decorations balanced. Too many add-ons can make the backdrop look cluttered. Focus on a few key elements that enhance your design.
Once you’ve added the final touches, step back and admire your work. You’ve just created a show-stopping balloon backdrop that’s sure to impress your guests!
Customizing Balloon Backdrops for Any Event
Seasonal and Holiday Themes
Turn your balloon backdrops into festive displays for any season or holiday. For Christmas, pick red, green, and gold balloons. Add snowflakes or tiny ornaments for charm. Halloween works well with black and orange balloons. Include spooky touches like bats or cobwebs. Spring looks great with pastel balloons and flowers, while summer shines with bright yellows, blues, and tropical styles.
Special effects like balloon drops make holidays extra fun. Picture balloons falling at midnight on New Year’s Eve—it’s a magical memory guests will love.
Tip: Add themed props like signs or banners. A “Happy Easter” sign can make your backdrop stand out!
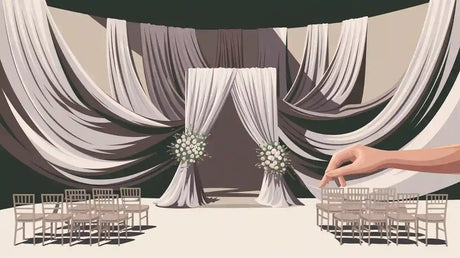
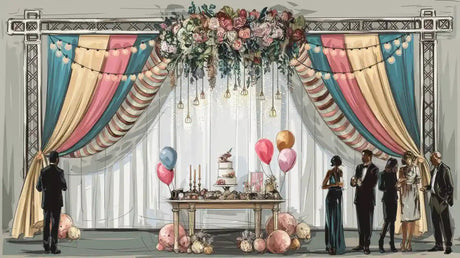
Event-Specific Designs (Weddings, Birthdays, etc.)
Balloon backdrops are amazing for weddings, birthdays, and big events. For weddings, use white, gold, or blush balloons for elegance. Add flowers or greenery for romance. Birthday parties need bright colors and fun designs. Include number balloons to show the age being celebrated.
Here’s how balloon backdrops are used for events:
Birthday Parties: Add fun and color to the celebration.
Weddings: Perfect for receptions or photo spots.
Anniversaries: Celebrate milestones in style.
Graduations: Show off school colors with pride.
Baby Showers: Great for gender reveals or themes.
The balloon decor market is growing fast. In 2021, it was worth $1,482.8 million USD. By 2028, it’s expected to reach $1,964.4 million USD. This shows how popular balloon backdrops are becoming for events.
Incorporating Personal Elements
Adding personal touches makes balloon backdrops special. Use names, monograms, or messages to honor someone. For business events, match balloon colors to the company’s brand. You can also add surprises like confetti cannons to wow your guests.
Here’s a simple guide to customization ideas:
Customization Idea |
What It Does |
|---|---|
Balloon Drops |
Creates a fun moment with falling balloons, exciting everyone. |
Color and Design Matching |
Matches balloons to event themes or company colors for a polished look. |
Special Effects |
Adds fun surprises like confetti cannons to make the event unforgettable. |
Pro Tip: Don’t overdo personal touches. Focus on one or two key features to keep your design clean and memorable.
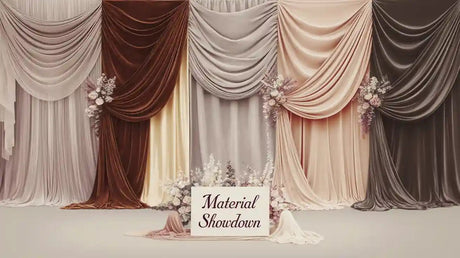
Playing with Colors and Patterns
Colors and patterns can completely transform your balloon backdrop. They set the mood and make your display pop—literally! By playing with different combinations, you can create a design that feels unique and perfect for your event.
Start by thinking about your event’s theme. Are you hosting a baby shower? Pastel shades like soft pinks, blues, and yellows create a sweet and calming vibe. For a birthday party, bold colors like red, orange, and purple bring energy and excitement. If you’re aiming for elegance, try a monochromatic scheme. Using shades of the same color, like all whites or golds, adds a touch of sophistication.
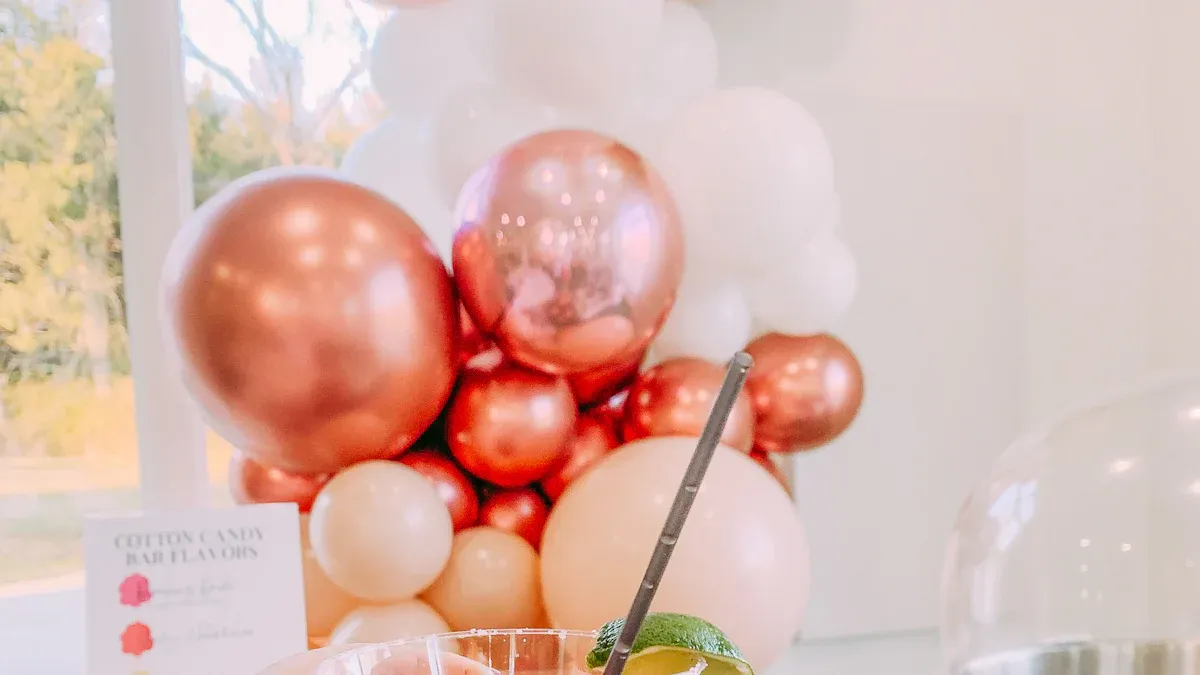
Want to make your backdrop stand out even more? Use complementary colors. These are colors opposite each other on the color wheel, like blue and orange or purple and yellow. They create striking contrasts that grab attention. Metallic balloons, like gold or silver, can also add a luxurious feel. Pair them with neutral tones, such as white or beige, to balance the look.
Patterns are another fun way to add personality. Polka dots, stripes, or even animal prints can make your backdrop playful and eye-catching. For example, polka-dotted balloons mixed with solid colors can create a whimsical design. Striped balloons, on the other hand, add a modern and trendy touch.
Tip: Don’t overdo it. Stick to two or three colors and one pattern to keep your backdrop looking clean and stylish.
Experiment with different combinations until you find the perfect mix. With the right colors and patterns, your balloon backdrop will be the star of the party! 🎈
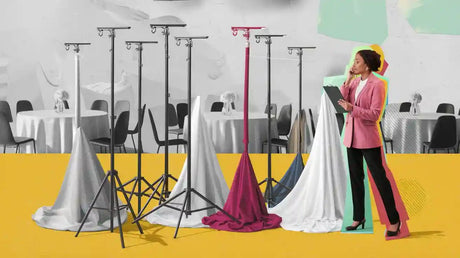
Tips for a Professional Finish
Making your balloon backdrop look professional is easier than you think. With simple tricks, you can make it look amazing. Here are some tips to help you get a polished finish.
Balancing Balloon Sizes and Colors
Mixing balloon sizes makes your backdrop look interesting. Use big, medium, and small balloons together. This adds depth and keeps it from looking flat.
Pick two or three colors that go well together. Soft pastels with metallics look fancy, while bright colors are fun. Spread the colors evenly so they don’t clump together.
Tip: Step back often to check how it looks. Seeing it from far away helps you spot problems.
Creating Depth and Texture
Layering balloons makes your backdrop look 3D and cool. Start with big balloons, then add medium ones, and finish with small ones. This creates depth and makes it stand out.
Use different balloon types for texture. Matte, shiny, and metallic balloons look great together. Add greenery, flowers, or ribbons for extra style.
Pro Tip: Group small balloons in threes or fives to fill gaps. Odd numbers look more natural.
Ensuring Stability and Durability
Make sure your backdrop stays up during the party. Use weights or sandbags to keep the frame steady. If it’s on a wall, use strong adhesives to hold it.
Don’t overfill balloons. Slightly underfilled ones last longer and won’t pop easily. For outdoor events, use UV-resistant balloons to avoid fading or bursting.
Note: Keep extra supplies nearby. Extra balloons, glue dots, and a pump can fix problems fast.
Follow these tips to create a sturdy and stunning balloon backdrop. Your guests will love how professional it looks! 🎈
Avoiding Common Mistakes
Even the best DIY projects can hit a few bumps along the way. When it comes to balloon backdrops, avoiding common mistakes can save you time and frustration. Here’s how you can sidestep the most frequent issues and keep your display looking flawless.
1. Overinflating Balloons
It’s tempting to inflate balloons to their maximum size, but this often leads to popping. Overinflated balloons are more fragile and prone to bursting, especially in warm or outdoor settings.
Tip: Inflate balloons until they’re firm but not stretched. A slightly underinflated balloon is easier to work with and lasts longer.
2. Ignoring Color Balance
A mismatched color scheme can make your backdrop look chaotic. Clumping similar colors together or forgetting to spread them evenly can throw off the design.
-
What to Do:
Plan your color layout before attaching balloons.
Alternate colors as you layer balloons to create a balanced look.
3. Skipping Balloon Sizing
Using balloons of the same size can make your backdrop look flat and boring. Without variation, it lacks depth and texture.
Pro Tip: Use a mix of large, medium, and small balloons. A balloon sizer can help you keep sizes consistent for a polished finish.
4. Weak Frame or Support
A flimsy frame can ruin your hard work. If the structure collapses or shifts during the event, your backdrop won’t hold up.
-
How to Fix It:
Use weighted bases or sandbags for stability.
Test the frame’s sturdiness before attaching balloons.
5. Leaving Gaps Between Balloons
Visible gaps can make your backdrop look incomplete. They’re especially noticeable in photos and can distract from the overall design.
Quick Fix: Fill gaps with smaller balloons or clusters. Odd-numbered groups, like three or five balloons, look more natural and appealing.
6. Using the Wrong Adhesives
Not all adhesives work well with balloons. Some can damage the surface or fail to hold them securely.
-
Best Choices:
Balloon glue dots for small balloons.
Balloon tape strips for garlands.
Fishing line for larger setups.
7. Forgetting to Check for Popped Balloons
A popped balloon can leave an unsightly hole in your design. If you don’t check regularly, it can affect the overall look.
Tip: Keep extra balloons and tools handy. Replace popped balloons quickly to maintain your backdrop’s appearance.
8. Not Considering the Event Space
A backdrop that’s too big or too small for the venue can feel out of place. If it’s too large, it might overwhelm the space. If it’s too small, it won’t make an impact.
-
Solution:
Measure the area before starting.
Adjust the size of your backdrop to fit the space perfectly.
9. Overloading Decorations
Adding too many accessories can clutter your design. Instead of enhancing the backdrop, it can make it look messy.
Note: Stick to a few key decorations that complement your balloons. Less is often more when it comes to styling.
By avoiding these common mistakes, you’ll create a balloon backdrop that’s not only beautiful but also durable and well-suited to your event. Take your time, plan carefully, and enjoy the process—you’ve got this! 🎈
Troubleshooting Balloon Backdrops
Fixing Gaps or Uneven Placement
Gaps or uneven balloons can make your backdrop look messy. To fix this, focus on spacing and balloon sizes. Step back and look at your backdrop from far away. This helps you see where changes are needed.
Here’s how to fix it:
Fill gaps with smaller balloons: Use 5-inch balloons or small clusters to cover spaces.
Move balloons around: Adjust balloons gently to make the design look even.
Check balloon sizes: Make sure all balloons are inflated to the right size. Uneven sizes can ruin the look.
Tip: Tie balloons tightly so they don’t move during the party. Evenly spaced balloons make your backdrop look neat and complete.
Preventing Popped Balloons
Popped balloons can ruin your design and leave empty spots. To stop this, handle balloons carefully and pick strong materials.
Don’t overfill balloons: Slightly smaller balloons are less likely to pop.
Keep away from sharp things: Avoid sharp edges, rough surfaces, or jewelry near balloons.
Use strong balloons: Choose high-quality latex or foil balloons for durability.
If your event is outside, use UV-resistant balloons. Regular balloons can weaken in sunlight and pop more easily.
Pro Tip: Inflate extra balloons as spares. You can quickly replace any that pop during the event.
Adjusting for Outdoor Use
Outdoor parties can make balloon backdrops tricky. Wind, sunlight, and uneven ground can cause problems.
Secure your frame: Use weights or sandbags to keep it steady.
Pick outdoor-friendly materials: UV-resistant balloons and strong frames work best.
Block the wind: Place your backdrop near a wall or use windbreakers for protection.
Note: Inflate balloons a little less for outdoor events. Heat can make balloons expand, so underinflating helps prevent popping.
With these tips, your balloon backdrop will look great, indoors or outdoors! 🎈
Repairing or Replacing Damaged Balloons
Damaged balloons can happen, but don’t worry—it’s an easy fix! Whether a balloon pops, deflates, or looks out of place, you can quickly repair or replace it to keep your backdrop looking flawless. Here’s how you can handle these common issues like a pro.
1. Fixing Deflated Balloons
Sometimes, balloons lose air and start to sag. Instead of removing them, try reinflating them. Use a hand pump or electric inflator to add more air. Be gentle to avoid overinflating. If the balloon has a small hole, you can patch it with clear tape or a balloon patch kit.
Tip: Always check for leaks before reinflating. Submerge the balloon in water or feel for escaping air to find the hole.
2. Replacing Popped Balloons
A popped balloon can leave an unsightly gap in your design. To replace it:
Inflate a new balloon to match the size of the original.
Attach it using glue dots, balloon tape, or fishing line.
Adjust the surrounding balloons to blend the new one seamlessly into the design.
Pro Tip: Keep extra balloons in your event colors on hand. This way, you can replace popped ones quickly without disrupting the party.
3. Preventing Future Damage
To avoid more damaged balloons, keep sharp objects and heat sources away from your backdrop. If you’re outdoors, shield the balloons from direct sunlight and wind.
With these simple steps, you can repair or replace damaged balloons in no time. Your backdrop will stay picture-perfect, and your guests will never notice a thing! 🎈
Creating balloon backdrops is simpler than you might think, and the results are always worth it. You’ve got everything you need—balloons in various sizes, a sturdy frame, and tools like glue dots or fishing line. The steps are straightforward: plan your design, inflate the balloons, assemble the frame, and layer the balloons for depth. Adding personal touches, like fairy lights or greenery, makes it even more special.
The best part? It’s a creative process that lets you have fun while crafting something unique. Many DIYers love the floating balloon wall effect and even suggest clever tricks, like adding water to the bottom balloons for extra stability. So, why not give it a try? Your next event deserves a show-stopping centerpiece, and you’re just the person to make it happen! 🎉
FAQ
What’s the best way to store balloons before the event?
Keep balloons in a cool, dry place away from sunlight or sharp objects. Heat and humidity can weaken them. Store them in a sealed bag to prevent dust or dirt from sticking.
Tip: Inflate balloons no more than 24 hours before the event for the best results.
How do I prevent balloons from popping during setup?
Underinflate balloons slightly to reduce tension. Avoid sharp tools or surfaces while handling them. If you’re outdoors, use UV-resistant balloons to protect them from sunlight.
Pro Tip: Inflate a few extra balloons as backups in case of accidents.
Can I reuse a balloon backdrop for another event?
Yes, but only if the balloons are in good condition. Carefully deflate them and store them in a cool, dry place. Reusing the frame is much easier, so keep it intact for future use.
How many balloons do I need for a backdrop?
It depends on the size of your backdrop. For a small setup, you’ll need around 50–100 balloons. Larger backdrops may require 200 or more. Plan your design first to estimate the exact number.
What’s the easiest way to attach balloons to the frame?
Balloon tape strips or glue dots work best. They’re easy to use and keep everything secure. Fishing line is another great option for larger setups.
Note: Test your adhesives on a small area to ensure they hold without damaging the frame.